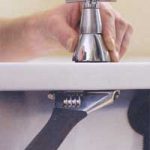
Disconnecting
A This can sometimes be easier said than done. As you have probably discovered, the connections for these (as with many other plumbing connections) are a little awkward to get to. Not only that, but the fact the taps have been fitted for several years often means the connections have ‘welded’ themselves together. This is actually caused by corrosion. There are a couple of ways round this. Try applying a release-oil supplied in spray dispensers. The oil is very fine and when allowed to act for a period of time can sometimes penetrate sufficiently to break the corrosive bond. The second option is to play a little heat on the connection with a blow torch. Do not use a hot air stripper in the vicinity of water. Heat causes expansion of metal and this will almost invariably assist in releasing the bond between components. However, be cautious as heat will damage plastic waste pipes nearby and can crack ceramic basins relatively quickly.
B If possible, try to disconnect the taps from the final connection between them and the supply pipe. That way, you will be left with the maximum amount of pipework onto which to connect the new taps.
C To reach awkwardly positioned connections, there are several models of tap spanner available to make this job a little easier. The tap spanner is devised so that the head is mounted at right angles to the shaft, enabling leverage to be made from an oblique angle. There are even self-gripping multi-fit multi-angle tap spanners.
D If disconnection close to the tap itself proves too difficult, you will need to cut the pipe or undo a fitting further away from the taps. This will, however, mean a little extra work to extend the pipes to reach the new taps once more.
E Once the connections to the supply pipes have been undone, remove the taps by undoing the retaining nut beneath the basin, and lifting the tap clear.
F Clean off any mounting compound that has been used to seat the base of the tap against the basin.
Replacing
A Check through the manufacturer’s instructions to see where each part fits. New taps are generally supplied with rubber or plastic washers which sit immediately above and below the hole in the basin. These take up pressure when the mounting nut is tightened.
B Mount the taps and fasten them, taking care not to apply too much pressure.
C Adjust the length of the original supply pipes to suit the new taps. This may mean cutting them back or extending them, depending upon the type of tap being fitted. Measure carefully and remember to allow for the connection fitting between the two. If there is room, consider fitting an in-line mini valve to provide a means of easily switching off the supplies for maintenance at a later date.
D It is sometimes more convenient to connect new tails to the taps with the supplied tap connectors and to cut back the existing plumbing to suit. This way, the awkward to get at connection to the tap can be made more easily.
E Connect the supply pipes.
F Switch the water supply back on and inspect the work for signs of leakage.


